- Photographing the Bright Sun on a Clear Day
- Bear Boat/Bears Catching Salmon IPT Announced
- Fort DeSoto in Spring/Breeding Plumage IPT Announced
- Great 7D II/DPP v4.01.0 News
- The DPP 4 eGuide (PDF)
- Canon EOS-7D Mark II Histogram Set-up Tip
- The New Canon EF 100-400mm f/4.5-5.6L IS II USM Lens
- Selling Your Used Photo Gear Through BIRDS AS ART
- Used Canon EF 600mm f/4L IS II USM Lens
|
|
|
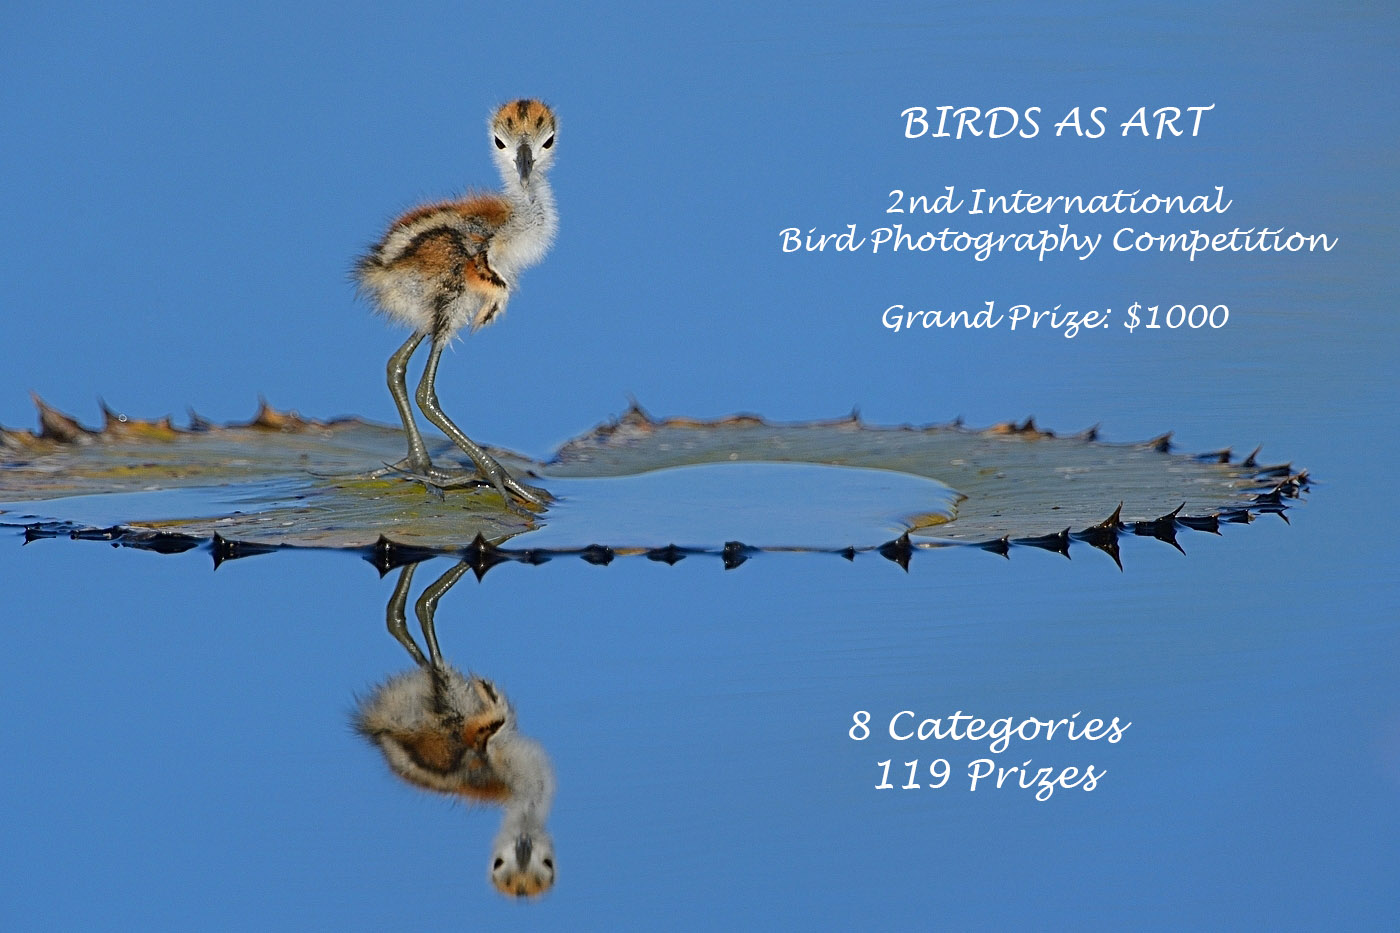
This image was created on December 1, 2003 with the tripod-mounted Canon 500mm f/4L IS lens (now replaced by the Canon EF 500mm f/4L IS II USM lens, stacked 1.4X and 2X TCs separated by a 12mm EF Extension tube (now replaced by the Canon Extender EF 1.4X III, the Canon Extender EF 2X III, and the Canon Extension Tube EF 12 II, and the Canon EOS-1D Mark II (now replaced by the Canon EOS-1D X). ISO 50. Manual Mode: 1/8000 sec. at f/64. Snow Goose against bright sun, Bosque Del Apache NWR, NM. I remember jumping for joy when I first saw this image on the camera’s LCD. As my Photoshop skills have improved just a bit since 2003 I recently moved this bird back in the frame a bit. It was fully set against the sun as the image came out of camera but just a bit too far forward in the frame for my taste. |

Photographing the Bright Sun On a Clear Day
Photographing the bright sun on a clear day is very likely the most challenging and potentially dangerous exposure (and silhouette) situation that you will ever encounter. Images in this category are created on clear days with the sun up and fully clear of the horizon. The sky around the sun in these situations is an extremely bright white. On a clear day the sky will always appear totally black in a properly exposed image that includes the sun because we are underexposing a ton in an effort to avoid blinkies on the sun. When photographing the bright sun on a clear day, care must be taken not to damage one’s eyes. If you look away from the sun and the world looks purplish, cease and desist or risk serious and permanent eye damage. In addition, it is best to restrict such efforts to one half hour after sunrise and one half hour before sunset. If the sun is visible but is well-muted you should be fine but better to err on the side of caution.
When creating these types of images you can use a super-telephoto lens with either stacked teleconverters–you need a 12mm tube between them in order to mount them-or with the 2X TC alone. The latter is great with a 1.6 crop factor camera body like the EOS-7D Mark II. To begin, choose your camera’s absolute lowest ISO setting, usually ISO 50 or ISO 100. Folks who use DPP to convert their images and have HTP (Highlight Tone Priority) enabled, will need to disable it in order to get below ISO 200. As I often need to get to the lowest ISO when creating pleasing blurs, I register HTP on My Menu.
Next, you will set your camera’s fastest shutter speed (usually 1/8000 sec.). Now set the smallest aperture. Then focus manually on a tiny sliver of the edge of the sun. Never ever look directly at the whole bright sun especially through a long telephoto lens. Now engage the stop-down lever. The image in the viewfinder will be very dark, or at least dark enough for you to center the sun in the frame without damaging your eyes. Do not release the stop-down lever while you are looking through the viewfinder…..
Now make a test image and check for blinkies. As you have set your darkest exposure, you are plumb out of luck if you have significant blinkies unless you add a drop-in neutral density filter to the mix. I use a 0.9 (3-stop) screw-in type drop-in ND filter. (I believe that I have covered those and the Canon 52mm filter holder situation as well in a previous blog post; if yes, I would be most appreciative to whomever could shoot me a link.)
If you hope to capture an image featuring a bird flying across the face of the sun (like the image above) you do of course need to find some birds flying relatively consistent flight paths. This situation arises most mornings at Bosque. After you have set the exposure as described above, focus manually and approximately on the birds (not on the sun).
Now you are ready to frame the sun again. And again, you must use the depth-of-field preview feature so that you will be seeing a drastically darkened sun. Once you have pressed the preview button, make sure to keep it depressed as you frame the image. If your finger slips off while the sun is in the frame you may damage your eye. Once you have put the sun where you want it in the frame, lock the tripod head just enough to keep the lens from shifting once you let it go. Now you are ready to try to make an image as the birds fly across the face of the sun. Again, in no case should you look through the viewfinder when attempting to photograph the bright sun. If you do so while holding down the preview button, your retina will be hit by a bright flash of light when the shutter opens. Furthermore, by the time you see a bird in front of the sun, it will be too late to press the shutter button.
Here is the technique that I use: After you have tightened the tripod controls, place the closed fist of your left hand atop the lens barrel with your thumb extended and pointing towards the sky. Move your head so that the sun is hidden behind your thumb and when you see a bird flying into the center of your thumbnail, press the shutter button with your right index finger (as you usually would). When using the 2X TC alone, I shade the sun with my left hand and watch as birds approach the sun. As soon as the possibility of having a bird or a small group of birds fly in front of the sun, I hold the shutter button down and make a long sequence of images. In fact, I hold the shutter button down until the birds are past the sun. Understand that you will need to re-frame the sun every minute or so as the earth is spinning away from it at great speed. This is an extremely challenging situation but with study, careful technique, and a bit of luck, you just might make some great images.
When creating images that include the sun on a clear day while working with short lenses the exposure principles are the same but you would never want to create an image that has no blinkies on the sun as the rest of the image would be many, many stops underexposed…. With shorter focal length lenses be sure to work at f/22 or smaller (that is generally not a problem) so that you have a chance of getting a nice starburst effect. Even looking at the sun through a short lens may damage your eyes….
As Sergeant Phil Esterhaus used to say at the start of each episode of Hill Street Blue, “Let’s be careful out there.”
The Art of Bird Photography II
The tutorial above was adapted from an excerpt from The Art of Bird Photography II (APB II: 916 pages, 900+ great images, on CD only. Can be adapted for iPad and Kindle).
|
|
|
All of the images in the bear boat card above were created in Katmai National Park during the month of September. |

Bear Boat/Bears Catching Salmon IPT: September 1-8, 2015 from Kodiak, AK/6 FULL & 2 1/2 DAYS: $6699. Happy campers only! Maximum 8/Openings: 7. Plus the leader: Arthur Morris.
If I do not have four deposit checks in hand by 1/31/2015 I reserve the right to scrap this trip so please do not purchase your plane tickets until you hear from me. 🙂
Join me in Katmai National Park, AK for seven days of photographing Coastal Brown Bears (grizzlies) catching salmon, fattening up for the long winter. Other subjects will include Mew and Glaucous-winged Gulls in flight and dip-feeding on salmon roe. Did I mention that we live on a boat and that the food is great? Most of our photography will be done in a variety of famed locations: Geographic Harbor, Kinak Bay, and Kukak Bay. We once had 39 bears fishing the creek at Kukak….
It is mandatory that you be in Kodiak no later than the late afternoon of August 31, 2015 September to avoid missing the float planes to the boat on the morning of September 1. With air travel in AK being what it is, with the chance of fog or other bad weather–being on Kodiak on August 30 is an even better plan). I be on Kodiak on August 30 to avoid any potential disaster. That said in my nearly a dozen bear boat trips I was delayed only once but since I was day early as noted above there was no harm, no foul.
We will take one or more float planes to the boat mid-morning on September 1. We will photograph bears fishing that afternoon and every day for the next six days (weather permitting of course). We should have bears catching salmon every day. In addition, we will get some nice stuff on Mew Gull and Glaucous-winged Gulls dining on roe and the remains of predated salmon. We may–depending on where the concentrations of bears are–get to photograph Harbor seals and some hauled out Steller’s Sea Lions (an endangered species). Halibut fishing (license required) is optional. On September 8, our last morning on the boat, those who would like to enjoy one last photo session will do so. The group returns to Kodiak via float plane midday. Most folks will fly to Anchorage and then continue on red-eye flights to their home cities.
The eight days will consist of six full days (Sept 2, 3, 4, 5, 6, & 7) of photography featuring lots of Coastal Brown Bears catching salmon as above plus a variety of other natural history subjects plus some nice scenic photography that I forgot to mention above. Plus the first afternoon and the last morning.
What’s included? 8 DAYS/7 NIGHTS on the boat as above. All meals on the boat. (The food is quite excellent.) National Park fees. One night’s double occupancy lodging on Kodiak; arrive: Sept 1/depart: Sept 2. The thank-you-in-advance dinner on Sept 1. In-the-field photo tips, instruction, and guidance. An insight into the mind of a top professional; I will constantly let you know what I am thinking, what I am doing, and why I am doing it. Small group image review, image sharing, and Photoshop instruction on the boat.
What’s not included: Your round trip airfare to and from Kodiak, AK (almost surely through Anchorage). All necessary lodging other than the cost of your double occupancy room on the night of August 31 should you opt to arrive early–we can arrange that in advance for you. We will let you know the cost of a single supplement for the one night if so desired. The cost of the round-trip float plane to the boat on September 2 and back to Kodiak on September 9. The cost of a round trip this year was $500. The suggested crew tip of $210.
Is this an expensive trip? Yes, of course. But with 6 full and two half days, a wealth of great subjects, and the fact that you will be walking with the bears just yards away (or less….) it will be one of the great natural history experiences of your life. Most folks who take part in a Bear Boat IPT wind up coming back for more.
A $2,000 per person non-refundable deposit by check only made out to “Arthur Morris” is required to hold your spot. Please click here to read our cancellation policy. Then please print, read, and sign the necessary paperwork here and send it to us.
Your deposit is due immediately. That will leave a balance of $4699. The next payment of $2699 will be due on February 15, 2015. The final payment of $2000 is due on May 1, 2015.
I hope that you can join us for this wondrously exciting trip.
By e-mail from Bill Keown, veteran of three bear boat trips!
Hi Artie, What a great trip! With the exception of the one bright sunny day it was just great. Very different from my first trip in June where we only had the bears clamming; the fishing bears were amazing! As always I learned a lot and enjoyed the group immensely. All the Best, Bill
|
|
|
Fort DeSoto in spring can be bird photographer’s heaven. And most of the birds are stupid tame. |

Fort DeSoto in Spring/Breeding Plumage IPT: April 24-26, 2015. 3 FULL DAYs: $1099. Limit 8/Openings: 7.
Meet and Greet at 8pm on Thursday, April 23.
Join me at Fort DeSoto at the height of the breeding season for many of our target species: Laughing Gull, Royal Tern, Sandwich Tern, dark and light morph Reddish Egret, Great Egret, Tricolored Heron, and Yellow-crowned Night-Heron. In addition, we will have a good shot at photographing a variety of arctic-bound shorebird species in breeding plumage. We should have good chances with a variety of courtship behaviors including courtship feeding, courtship displays, pre-copulatory stands, and copulation.
On this IPT you will the learn basics and fine points of digital exposure and how to get the right exposure every time after making a single test exposure, how to approach free and wild birds without disturbing them, to understand and predict bird behavior, to identify many species of shorebirds, to spot the good situations, to choose the best perspective, to see and understand the light, and to design pleasing images by mastering your camera’s AF system. And you will learn learn how and why to work in Manual mode (even if you’re scared of it).
At lunch (included) we will review my images–folks learn a ton watching me edit–why keep this one and delete that one. If you opt to bring your laptop, we will take a look at five of your best images from the morning session. We will process a few of my images in Photoshop after converting them in DPP. That followed by Instructor Nap Time.
A $499 non-refundable deposit is required to hold you spot. The balance, $600 will be due on February 7, 2015. Please click here to read our cancellation policy. Then please print, read, and sign the necessary paperwork here and send it to us.
See more on Fort DeSoto in spring here.
Fort DeSoto Site Guide
Can’t make the IPT? Get yourself a copy of the Fort DeSoto Site Guide. Learn the best spots, where to be when in what season in what weather. Learn the best wind directions for the various locations. BAA Site Guides are the next best thing to being on an IPT. You can see all of them here.
|
|
|
DPP 4 is completely new and different from the various versions of DPP 3. It handles files only from the following cameras: EOS-1D X, EOS 5D Mark III, EOS-6D, and the EOS-7D Mark II. |

Great 7D II/DPP v4.01.0 News
An updated version of Canon Digital Photo Professional that supports RAW files from the EOS-7D Mark II is available for download the Canon USA website. Here is a hint for Mac folks: after you double click on the downloaded zip file you need to go to your desktop and click on the icon that was magically created there in order to begin the installation.
To download DPP v4.1 first click here and then click on Drivers and Software and follow the prompts.
|
|
|
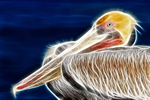
The Photographers’ Guide to Canon Digital Photo Professional 4.0 by Arash Hazeghi and Arthur Morris is now available. Click here to order. The DPP 4 eGuide will be updated soon to include sharpening and NR values for the 7D II. |

The DPP 4 eGuide (PDF)
BIRDS AS ART is proud to announce the release of The Photographers’ Guide to Canon Digital Photo Professional 4.0 by Arash Hazeghi and Arthur Morris: $40.
Artie first went to DPP because he was not happy with the colors he was getting with 1D X and 5D III images from ACR (Adobe Camera Raw). Though less than intuitive, he found it fast and easy to use once he mastered the basics. He collaborated with Arash Hazeghi on the first DPP RAW Conversion Guide. Do understand that the DPP RAW Conversion Guide details the use of various iterations of DPP 3. He calls those the DPP 3.whatever versions. The latest version is DPP 3.14.41.0.
DPP 4 performed superbly with his 1D X and 5D III images, and now does the same with 7D II images as well. When he first opened DPP 4 he felt as if he were in the cockpit of a Boeing 747 and was being asked to fly it. There were so many tabs and buttons and controls that he simply closed the program. He immediately called Arash and asked him if he wanted to work together on a DPP 4 guide. After 100s of hours of work the guide is now ready to teach you to conveniently and easily use DPP 4 to create the finest possible image files from your 1D X, 5D III, and 6D image files. Basically, Arash sent artie a sophisticated outline that he re-crafted into a clear, concise, easily understood, and easy to follow how-to guide written in the BAA style. Arash created all of the charts, diagrams, and graphics.
His charts with recommendations for both Chrominance and Luminance Noise Reduction values for each of the 3 covered cameras at various ISO settings are alone worth the price of the book. He spent many dozens of hours experimenting with high ISO RAW files and shares his findings with you in the DPP 4 Guide. Folks will surely want to create some sort of easily accessible quick reference on their laptops and home computers.
DPP offers a host of great features some but not all of which are reminiscent of ACR. These include the following: Multi-image display, the extremely valuable Before/after Comparison layout, Highlight/shadow warnings, White Balance, and the eight RAW Conversion tabs that include sliders for Brightness, Highlights, Shadows, Contrast, Hue-Saturation, Color Tone, Sharpness, Noise Reduction, HSL (Hue/Saturation/Luminance), Lens Corrections, and Digital Lens Optimizer among others. We teach you how to best utilize each of those and many more. We share our slightly different DPP workflows and dozens of tips that will simply make your life easier. Arash uses DPP4′s rating system for choosing his keepers while artie continues to rely on BreezeBrowser Pro for that. DPP offers a variety of sorting filters. We explain all of the options. In addition, we teach you how to set your preferences and how to arrange your workspace for the greatest efficiency.
Both authors firmly believe that the manufacturer’s conversion algorithms will always out-perform 2nd party software when it comes to preserving image quality, fine detail, and accurate color rendition.
The authors wish to thank Chuck Westfall and Rudy Winston of Canon USA for their help; they are always available to answer our nit-picking questions. Sincere thanks also to Ken Kovak, Bob Schwartz, Dane Johnson, and John Stuhlmuller for their thoughtful and substantive reviews of late drafts of the DPP 4 manuscript.
You can order your copy of the DPP 4 Guide for $40 through the BAA Online Store by clicking here, by calling Jim or Jen in the office at 863-692-0906 with credit card in hand, by sending us a check made out to “Arthur Morris” or a money order for $40 to BIRDS AS ART, PO Box 7245, Indian Lake Estates, FL 33855, or by by sending a Paypal for $40 to e-mail. IN the latter two instances be sure to note DPP 4 Guide so we know what you are ordering :).
Note: The DPP 4 eGuide will be updated soon to include sharpening and NR values for the 7D II.


If what you learned on my blog about the Canon EOS-7D Mark II has inspired you to purchase this great new camera body, please consider using the logo link above to support our efforts here in bringing you the latest, greatest educational materials on daily basis.
Canon EOS-7D Mark II Histogram Set-up Tip
For several weeks I had been unable to figure out how to see both the luminance and RGB histograms on the same screen during image playback. With pretty much all recent Canon digital camera bodies you would simply toggle through the four different views during playback until you came to the one that displayed both histograms along with a thumbnail of the image and the shooting data.
As the 7D II comes out of the box only three views are displayed during playback and none of them feature both histograms. So, I e-mailed Rudy Winston and Chuck Westfall, two of Canon’s top tech reps. Chuck was the first to respond. He wrote, “Yes, it’s possible to see both histograms at the same time in playback mode on the 7D Mark II, but it’s different than with the older cameras. Start as usual by pressing the playback button, then press the Info button a couple of times if necessary to get to the screen that shows a histogram in the upper right corner. From that screen, scroll down with the joystick to reveal several different sets of information for the bottom half of the display. The second histogram is a couple of clicks down with the joystick.”
I tried it and bingo. I had both histograms displayed. While I was happy for that and appreciative as always–Chuck and Rudy are always there when I need help and always respond quickly, me thinks that this is a bit of reverse engineering. Why? With the older cameras you could enjoy one screen with both histograms, a thumbnail with blinkies, and the shooting info. With the 7D II that–at least as far as I know, is not possible. The view with both histograms gives you the thumbnail and the lens info (including the focal length with a zoom lens). But not the shooting data. From there one press of the Info button gets you to the full frame image, and another superimposes the shooting data on the image. (Note that all of my cameras are set to “Rotate on computer only” so that both the horizontals and the verticals are displayed as full frame during playback.)
As usual, thanks a stack Chuck!
The BAA Blog
If you missed seeing the item above or the item below you really do need to subscribe to the blog. My streak of 347 educational posts continues is till intact. Click here to learn for free :). The click on the Subscriptions tab on the right side of the yellow/orange tool bar to subscribe.
|
|
|
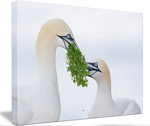
The Canon EF 100-400mm f/4.5-5.6L IS II USM lens was announced last night and is now available for pre-order. |

Canon EF 100-400mm f/4.5-5.6L IS II USM Lens
My take on this new lens…
I wish that I had one for Bosque….
The new 1-4 is a twist zoom. Zillions of folks complained about the dust that was sucked into the lens and visible when you looked through the lens from the front element of the original 100-400 despite the fact that such dust never affected a single image. This new lens will surely be sharper than the original that was well sharper than most photographers. That said most folks including me find a twist zoom more convenient than a push-pull zoom. Both Denise Ippolito and I used and loved our 100-400s with great success over many years. Denise still owns and uses hers. I sold mine a few years back and replaced it with the Canon EF 70-200mm f/2.8L IS II USM lens.
Though the new lens is about 1/2 pound heavier than the original version it will be easily hand holdable by most folks. It focuses much closer than the original 1-4, down to 3.2 feet or 97.54cm according to the recently published specs. This huge improvement in MFD, 6.6 feet or 2 meters for the original, turns this already versatile lens into a more than decent quasi-macro lens for flowers, butterflies, frogs, and other relatively small to medium-sized natural history subjects, all the while providing the narrow angle of view at 400mm that I love.
In short I can wait to get my hands on one, not only for Bosque but for my upcoming Southern Oceans trip….
You can learn more about the new 400 DO II in the recent blog here.
Selling Your Used Photo Gear Through BIRDS AS ART
Selling your used (or like-new) photo gear through the BAA Blog or via a BAA Online Bulletin is a great idea. We charge only a 5% commission. One of the more popular used gear for sale sites charges a minimum of 20% plus assorted fees! Yikes. The minimum item price here is $500 (or less for a $25 fee). If you are interested please e-mail with the words Items for Sale Info Request cut and pasted into the Subject line :). Stuff that is priced fairly–I offer free pricing advice, usually sells in no time flat. In the past few months, we have sold just about everything in sight.
You can see all the current listings here.
Used Canon EF 600mm f/4L IS II USM Lens
Only $9999
Mark Richman is literally giving away a barely used Canon EF 600mm f/4L IS II USM lens in mint condition for only $9,999. This one should sell instantly. The sale includes the original box and everything that came in it, the rear lens cap, the protective front hood, a 4th Generation Design CR-X 5 low foot, the original lens foot, the original box, the LensCoat that was installed on day one, and insured shipping via UPS Ground to US addresses only. Your gear will be shipped only after your check clears.
Please contact Mark via e-mail or by phone at 914-772-7060. Eastern Time Zone.
The new 600 is just a shade heavier than the old 500, is incredibly sharp, and kills with both teleconverters yielding focal lengths of 600mm, 840mm, and 1200mm with a full frame camera body. In short, it is the world’s premier super-telephoto lens. At 8.65 pounds it is hand holdable by many folks not including me. (Actually, I can hand hold if for flight for a very few minutes and can easily hand hold it while sitting on my butt. In comparison, the Nikon AF-S NIKKOR 600mm f/4G ED VR AF lens weighs in at a hefty 11.16 pounds…. I own a 600 II and use it regularly. Even after the recent $1,000 price drop the lens sells new for $11,999.00 at B&H as here.
Be sure to like and follow BAA on Facebook by clicking on the logo link upper right. Tanks a stack!
Support the BAA Blog. Support the BAA Bulletins: Shop B&H here!
We want and need to keep providing you with the latest free information, photography and Photoshop lessons, and all manner of related information. Show your appreciation by making your purchases immediately after clicking on any of our B&H or Amazon Affiliate links in this blog post. Remember, B&H ain’t just photography!
Amazon.com
Those who prefer to support BAA by shopping with Amazon may use this link:
Amazon Canada
Many kind folks from north of the border, eh, have e-mailed stating that they would love to help us out by using one of our affiliate links but that living in Canada and doing so presents numerous problems. Now, they can help us out by using our Amazon Canada affiliate link by starting their searches by clicking here. Many thanks to those who have written.
Typos
In all blog posts and Bulletins, feel free to e-mail or to leave a comment regarding any typos or errors. Just be right :).


When shooting solar images I avoid risking both my vision and my camera (sensor and shutter curtain) by using a solar filter. You can get an inexpensive sheet of specially coated mylar and stretch it over the front of the lens. The result is optically excellent and protects the camera from the heat of IR and well as blocking many stops of visible light. I use R-G Solar Film, from http://thousandoaksoptical.com/solar.html.
You can see the quality of such images in the Skies gallery of my Smugmug site: http://www.dianemiller.smugmug.com.
No problem!
🙂
Thanks Artie. We deviate rom the subject. The rest i is a matter of taste. Keep well!
It’s not just a matter of taste. It is a matter of courtesy. I write 1,000s of words here each week and need to work very hard to be both accurate and politically correct. I am fine if you do not like the image, I am fine if you like images of the moonrise better. Please be sure to mention that your opinions are your opinions, not fact 🙂 artie
I had no intention to place myself high above the rest of us. I think there is a difference of opinion what we try to achieve with our pictures. For me it is a way to reproduce what I see as faithfully as I possibly can framed in a rectangle, as a memory for myself or to be shared with others.
Then you need to be more careful about what you write. When you write ” It is easier and more beautiful to take pictures with a rising full moon” that does not leave much room for the opinions of others. You might try, “For me, images of a rising full moon are more beautiful…”
artie
But does direct sun not damage the sensor?
I am working on finding out know. My cameras have all been fine after creating the image above and similar images. artie
Dear Artie,
Thanks for your information how to photograph against the sun. But my question in this case is not how, but why! Unless there is an eclipse of the son I see no reason to endanger my eyes. The picture you showed in the beginning did not convince me to try it. It is easier and more beautiful to take pictures with a rising full moon.
I am always striving to create something new, something that some folks may feel is spectacular and different from what others have done before….. When you say “more beautiful” you place yourself high above the rest of us 🙂 artie
ps: I think that the image is rather amazing….
Artie – I first tried making similar images at Bosque a few years ago. As a physician, I have to say that if folks are going to chance their vision forever making such images, this is a great time to consider instead turning on LIVE VIEW, to set exposure, to focus and to compose, rather than relying on holding down a button as you try to focus while looking thru the viewfinder. This way you are never actually looking at the sun, but looking at the camera back instead. Live view will simulate the exposure and show you exactly what the picture will be like, but without the risk. Much safer. Ophthalmologist Randy, our mutual friend, strongly advised against ever letting oneself get the “purple spots”, as damage is beginning even at that point. If you burn your camera out, you can buy another one. You don’t get another set of eyes! Hope you are well. –Tim
Thanks Tim. It seems like a good idea. Remember that to succeed you need to focus manually at the approximate distance to the birds (w/o the sun in the frame) and then reframe. The latter, probably as you suggested.
I have written Chuck Westfall to ask about possible damage to various parts of the cameras. I shall report back.
later and love, artie