SENSOR CLEANING
FORT DESOTO SMALL GROUP IN-THE FIELD WORKSHOPS
UPDATE: THE KENYA PHOTO SAFARI, AUGUST 2004
24 REASONS TO JOIN A WARBLER IPT: POINT PELEE & CRANE CREEK
Photo Theme: sensor cleaning. Photos copyright Jim Litzenberg/BIRDS AS ART
SENSOR CLEANING
The method described below is adapted from the online materials that can be found here:
Do know that all camera manufacturers warn emphatically that camera owners should never attempt to clean the sensors in their digital cameras. BIRDS AS ART Bulletin Subscribers who opt to clean their sensor using the method below understand that they do so at their own risk. The camera manufacturers recommend that digital cameras should always be returned to the manufacturer for sensor cleaning. The problem is, that with most digital cameras, dust on the sensor and the resulting dust bunnies on your images is pretty much a daily problem... Sending your camera in to have the sensor cleaned three times a week is simply not a feasible option. Since carefully reading the article referred to above, I have successfully cleaned the sensors on my 1D and 1Ds many dozens of times without incident. In addition, I have cleaned the sensors for many folks on our IPTs, small group, and private In-The-Field Workshops.
Digital photographers who of their own free will and volition choose to undertake the chore of cleaning their camera's sensor on their own are urged to first read and then re-read the information provided in the link above several times as the author supplies a ton of background material, offers a more extensive set of directions with better photos, provides options as far as the choice of spatulas to use, and provides options for those who cannot get their hands on a small spatula (the Wendy's knife method is one).
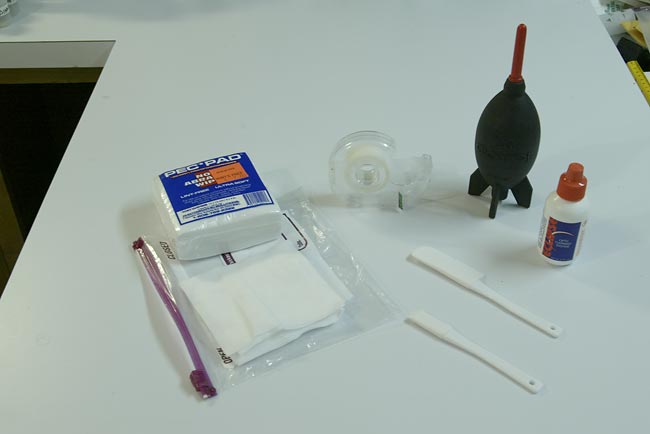
Here are the items in my sensor cleaning kit:
Counterclockwise from the lower left: Pec Pads, Scotch tape, Rocket Blower Bulb, Eclipse Cleaning Solution, Wal-Mart spatula, same spatula cut down and adapted for sensor cleaning. You can order your Eclipse solution, Pec Pads, and Rocket Blower from Hunt's or another supplier. The Scotch tape is easy, but finding the right spatula can be a challenge. Wal-Mart carries the spatula seen above. It is made by the Robinson Knife Company and comes in a 4-pack which sells for 92 cents, but three of the four spatulas are too large to use for sensor cleaning. If you are really lucky, your Wal-Mart may carry a one-pack with the perfect spatula; these retail for 47 cents. I found them in Louisville, KY and bought two dozen.
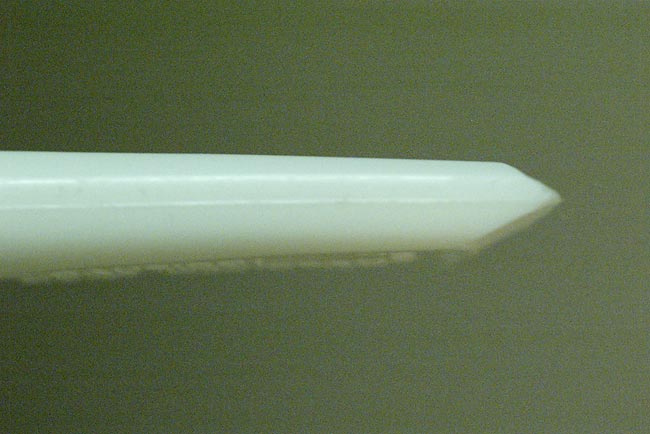
Why two dozen? Cutting and shaping the spatula is a difficult task. I prepared mine using a brand new Exacto knife and still ruined the first three attempts. (The link above notes that the spatulas are more easily adapted with a grinding wheel...) I cut the width of the rubber tip down to the size of the width of the plastic shaft, just about 1/2 inch exactly. (The author at the site mentioned above suggests that it be a bit wider for the 1Ds with its full-sized sensor.) This width proved perfect for cleaning the sensors of both my 1Ds and my 1D. The rubber blade of your spatula also needs to be shortened. It should wind up about 1 3/8 inches long. Rather than cutting the end square, I angled the cut about 3 degrees. This allows the tip of the spatula to reach the corners of the sensor more easily.
The tip also needs to be beveled like this:
(Note: cleaning the sensor of the 10D or any of the Nikon bodies with a 1/2 inch wide spatula may be problematic as the sensors are very smaller than the sensors on either the 1Ds or the 1D. Cutting a small spatula down to a width of about 35mm might prove ideal for cameras with the very small sensors.)
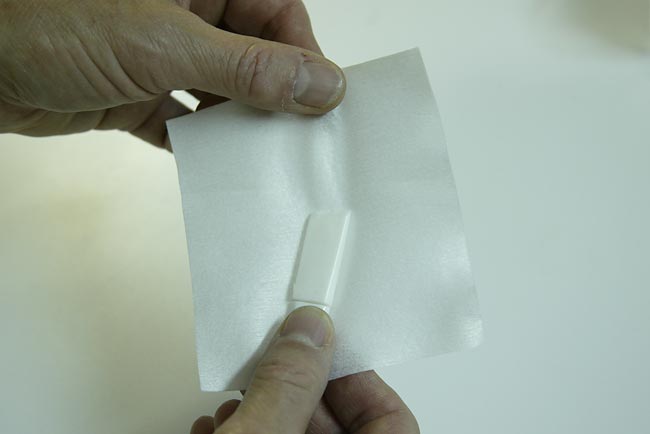
Now you are ready to put the Pec Pad onto the spatula. Carefully remove a pad from the pack without touching the surface that will touch the sensor. You make three folds to do this, much like the hospital corners on a bed sheet or the wrapping paper on a gift.
Lay the spatula atop the pad so that the tip of the spatula is half-way onto the pad, like this:
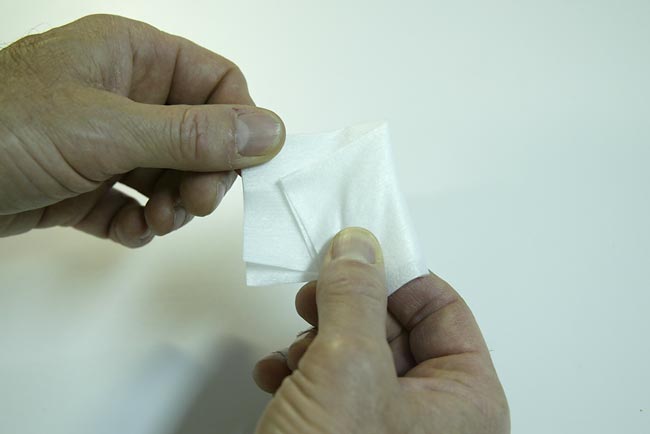
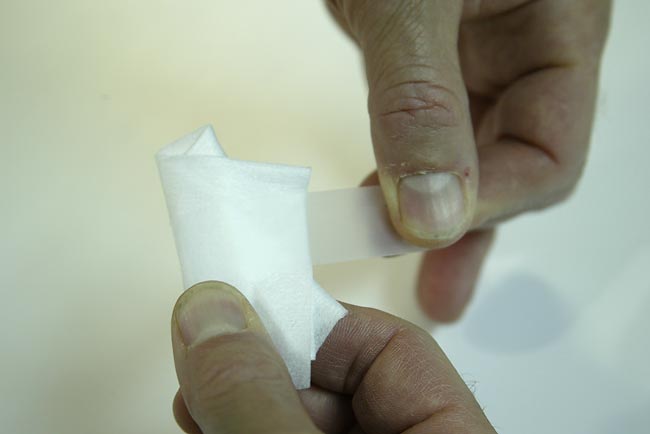
and then fold the pad up. Next, fold the pad over the spatula blade from one side so that it angles across the base of the tip by about 10 or 12 degrees. Be sure to pull it snugly. The next photo shows me preparing to fold the second side of the pad over the first fold (also at a 10-12 degree angle):
Next, secure the fold with a three inch strip of scotch tape. I fold the end of the tape over itself before taping the folds so that I can grab the tab and remove the pad easily after the cleaning. Here is a photo that shows me pulling the tape tight:
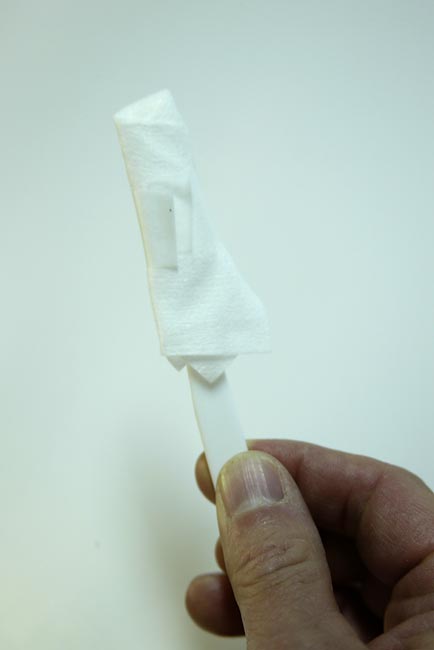
Here is the sensor swab ready to go:
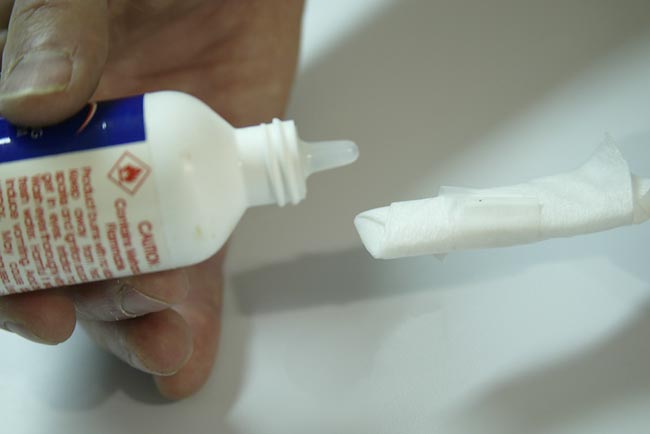
Next, place one drop of Eclipse solution on each side of the end of the folded Pec Pad:
Place the completed, moistened sensor swab down safely so that the tip stays clean while you ready the camera:
Now you are ready to raise the camera's mirror to expose the sensor so that it can be swabbed clean. Be sure to read the directions in your camera manual carefully. Rather than plugging the camera in to a power source as is recommended, I use a fresh camera battery figuring that there is always a chance that I could inadvertently trip over the power cord and disconnect it. Once the camera is in sensor cleaning mode with the mirror out of the way, I remove the camera's front cap, face the camera downwards, and use the Rocket Blower Bulb to displace some of the dust on the sensor, being careful not to let the tip of the blower bulb contact the sensor...
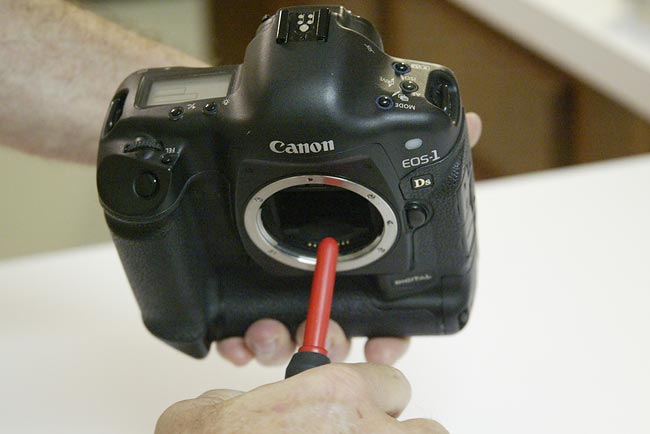
Take a deep breath: you are now ready to swab the sensor. Work under a bright light source. You will be swiping the sensor the long way one side at a time. It is important that you use one side of the swab to do half of the sensor, and the other side of the swab to do the other half (overlapping slightly as you go). I hold the camera vertically and start on the left half of the sensor (as I am looking at the camera). With the folded side down, I carefully place the corner of the sensor swab onto the corner of the sensor farthest away from me and use fairly firm pressure as I make one complete stroke. Then I turn the camera 180 degrees, flip the swab over, and use the unfolded side to make a firm swab in the opposite direction on the as yet unlearned half of the sensor. That's it. Here is what it looks like when I am placing the swab in position to make the first swipe:
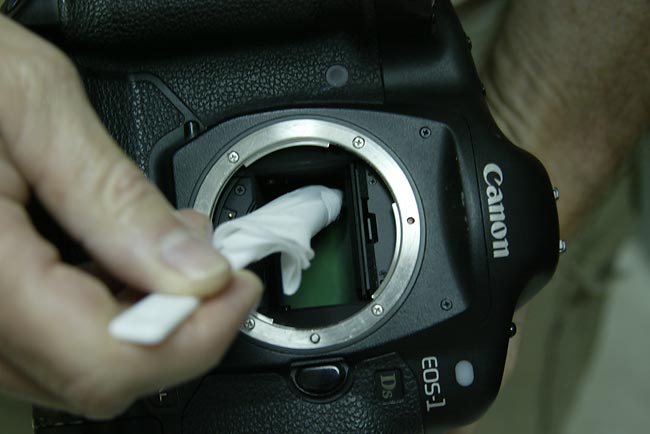
Notice that the angled tip makes it easier to position the swab on the corner of the sensor. Now replace the front cap and follow the steps needed to lower the mirror and exit sensor cleaning mode. (For the 1D and 1Ds cameras this is done by turning the on/off switch to the off position.)
The first time that you clean the sensor, I recommend making several passes in each direction with the same sensor swab to ensure loosening dust particles that have become somewhat stuck in place over time... Then, use a fresh pad and clean the sensor once or twice more. To see how well that you did, photograph a light portion of the sky at f/22 and then check the resulting image for dust bunnies... As your techniques improve, your results will improve also and you will routinely and consistently be able to remove more than 90% of the dust on your sensor.
Thank me very much <smile>
FORT DESOTO SMALL GROUP IN-THE FIELD WORKSHOPS
The April 2 & 3 Small Group In-The-Field Workshops were so successful that I am offering two more on May 1 and May 2. Early May can be spectacular at Fort DeSoto. The Royal and Sandwich Terns and the Laughing Gulls will still be courting, and some of the shorebirds will be molting into breeding plumage before they head north to the arctic.
Here is the day plan: Meet at 6:30 am and photograph until 10:30am. Lunch and photo-sharing at Bob Evans. Break--Instructor Nap Time. Photograph from 4pm till sunset. Kiss goodbye. Participating photographers are invited to send no more than three images from the day for critiquing.
Saturday, May 1, 2005. Fort DeSoto In-The-Field Workshop $300 per person payable in advance. Limit 6. In the event of rain, the workshop will feature and include macro photography and computer slide programs tailored to the individual needs of the group.
Sunday May 2, 2005. Fort DeSoto In-The-Field Workshop $300 per person payable in advance. Limit 6. In the event of rain, the workshop will include macro photography and computer slide programs tailored to the individual needs of the group.
Both days: $550.
To register, please send a check made out to "Arthur Morris" for the full amount to:
BIRDS AS ART
PO Box 7245
Indian Lake Estates, FL 33855
UPDATE: KENYA PHOTO SAFARI AUGUST 2004
This safari is sold out once again.
24 REASONS TO JOIN A WARBLER IPT: POINT PELEE & CRANE CREEK:
IPT UPDATES
Still Room! The St. Augustine Alligator Farm, FL IPT: 3-DAY ($829) APR 23-25, 2004 has four openings.
The Point Pelee Warbler IPT: 3-DAY ($829) MAY 9-11, 2004 has five openings.
The Magee Marsh, Toledo, OH Warbler IPT: 3-DAY ($829) MAY 14-16, 2004 is wide open.
The San Diego IPT JANUARY 6-9, 2005. 4-DAY: $1299 (Limit: 12) (Ellen Anon will assist me as co-leader on this IPT and conduct a Photoshop session.)
Best and great picture making to all,
Artie