FEATURES
- PHOTO EXPO WEST APPEARANCES
- CANON EOS-7D USERS GUIDE FREE EXCERPT
- CANON EOS-1D MARK IV USERS GUIDE FREE EXCERPT
 |
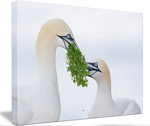
| Brown Pelican, LaJolla, CA Image copyright 2009: Arthur Morris/BIRDS AS ART |
| I am looking forward to visiting San Diego again this January. For late registration discount info on the San Diego IPT and a great guest blog post (with images) by Todd Gustafson who will be co-leading along with Tim Grey, click here. |
PHOTO EXPO WEST APPEARANCES
For the third consecutive year, I will be appearing at Photo Expo West, my visit sponsored by Canon USA’s Explorers of Light program. Delkin Devices, who makes the 32gb e-File Pro compact flash cards that I use and depend on every day, it the event organizer.
I will be doing slide programs and Live Demos on both Saturday and Sunday. It is a great event with lots of great speakers and vendors. You will find all details and the schedule here.
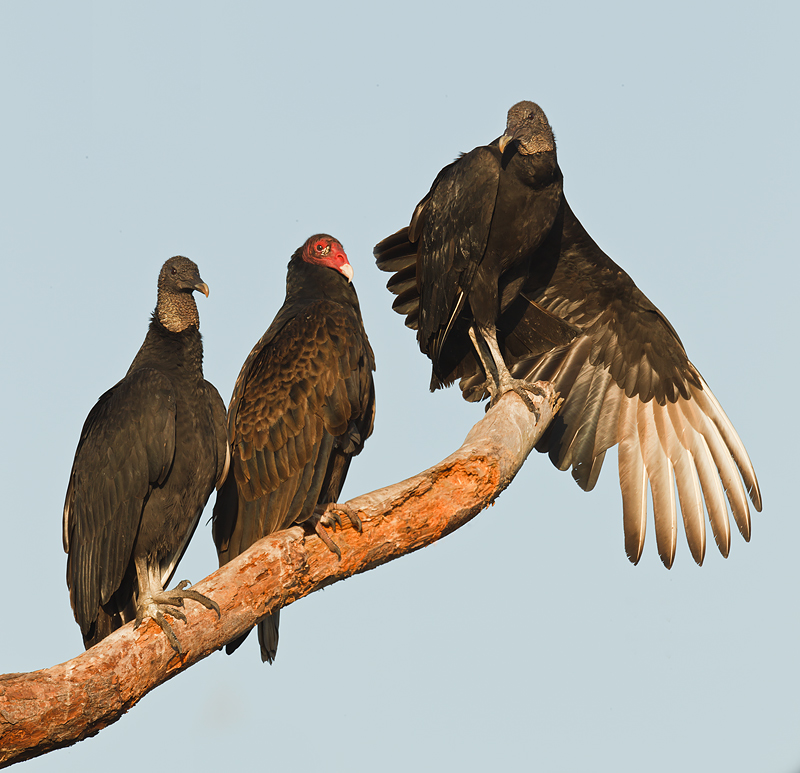 |
| Black Vultures (one stretching) with a Turkey Vulture, Indian Lake Estates, FL Image copyright 2010: Arthur Morris/BIRDS AS ART |
| This image (with a bit less YELLOW in it), was featured in yesterday’s Bulletin. Motivated by some comments from BPN crack Avian Moderator Randy Stout, I created a Photoshop tutorial as to how the image was created from two separate images made seconds apart. It is important that all of us learn to think digitally. To read this fascinating tutorial, see yesterday’s blog post, A Photoshop Lesson for Randy. |
CANON EOS-7D USERS GUIDE FREE EXCERPT
Choosing an AF Area Selection Mode
To toggle through the available AF Area Selection Modes first hit the grid button on the back top right corner of the camera body and then press the M-Fn button that lies just to the left of and slightly behind the shutter button. As this is totally new to this camera most experienced Canon users will find it ergonomically challenging; after months of using my 7D I still need to look for the M-Fn button. I am hoping that soon I will be able to do it instinctively without having to take my eye from the viewfinder. By studying the chart above you will quickly come to know the various modes so that you will recognize the various modes as you scroll through them. Please see the instructions for C.Fn III/6 below to learn to enable or disable the various AF Area Selection Modes.
Menu Items
On “Shooting 1,” the first red menu (with the camera set to P, Tv, Av, or M):
Quality: it is recommended that all serious nature photographers use full sized RAW capture 100% of the time. As the camera creates a reasonably sized JPEG at the moment of capture in addition to the RAW file, I do not opt to use any of the RAW + JPEG settings. I do this by setting the minus symbol (-) under the JPEG heading.
Red-eye Reduction: I leave this on Off (the default) except when using the pop-up flash to photograph people indoors. With Red-eye reduction “On” the red-eye reduction lamp will light when the shutter button is depressed half-way. The shutter will be released when the shutter button is fully depressed.
Beep: I leave the focus confirmation beep on at all times. The beep will sound when you are working in One-Shot AF or focusing manually. (If you are in AI Servo AF, you will never hear the beep.) First off, I like hearing the beep once I have locked focus as my vision is not as good as it used to be. When you are working just inside of the minimum focusing distance of you lens it is likely that the image in the viewfinder will look as if it is sharply focused whether it is or not. If you do not hear the beep in these situations then you know that you need either to move back at least a few inches or add an extension tube. (Be sure to check first and make sure that your lens is on the full distance range setting.)
There are times when I need to focus manually. In these instances, having the beep set to “On” is a huge plus. When you are focused accurately and you press the shutter button, the beep will sound. Tip: slowly turn the manual focusing ring while continuously pressing and releasing the shutter button. The sound of the beep is bingo! When you place an extension tube on the lens with a teleconverter on behind it will be necessary to focus manually. In these instances I find the beep a Godsend. It will of course be necessary to either have the lens on a tripod or to make sure that the position of the lens does not shift at all when handholding.
Release shutter without card: this should always be disabled. If you enable it it is possible to photograph for several hours without recording a single image. I call it “idiot proofing.”
Review time: this is largely a matter of personal preference. I always set mine to 8 seconds.
Peripheral illumination correction. I choose to ignore this item.
On “Shooting 2,” the second red menu (with the camera set to P, Tv, Av, or M):
Exp.Comp./AEB: With this menu item active you can set Exposure Compensation by first pressing the Set button in the center of the thumb wheel (the large round dial on the back of the camera that Canon calls the Quick Control Dial) and then rotating the thumb wheel clockwise to add light in 1/3 stop increments or counter-clockwise to subtract light in third stop increments. This however makes no sense to me at all. It is far easier to simply press the shutter button halfway without activating the menu and then dial in exposure compensation as above with the thumb wheel. Just to be clear on that: after you evaluate a scene or a histogram and wish to add or subtract light, simply press the shutter button half way and then turn the thumb wheel clockwise to add light in 1/3 stop increments or counter-clockwise to subtract light in third stop increments. There is no need to utilize the Exp.Comp./AEB menu function to set exposure compensation during the course of normal shooting.
It is, however, necessary to utilize the Exp.Comp./AEB menu function should you wish to set Automatic Exposure Bracketing with the 7D. To do so, press the Set button with the Exp.Comp./AEB menu item active and then set the amount of bracketing that you desire by turning the index finger dial (Canon calls this the Main Dial) clockwise to set AEB in third stop increments. You can reduce the amount of AEB that you have set in third stop increments by turning the index finger dial counter-clockwise. When you have set the desired amount of bracketing you must remember to press the Set button. You can cancel AEB either by turning the camera off and on (easiest and recommended) or by activating the menu item, pressing Set, turning the Index Finger Dial until the indicator returns to the null value. You can bracket around a compensated exposure by entering the desired amount of compensation either before or after setting the AEB. Note: AEB is most commonly used in nature photography when creating High Dynamic Range (HDR) imagery.
Auto Lighting Optimizer, the next menu item, affects only JPEGs; it is not relevant here.
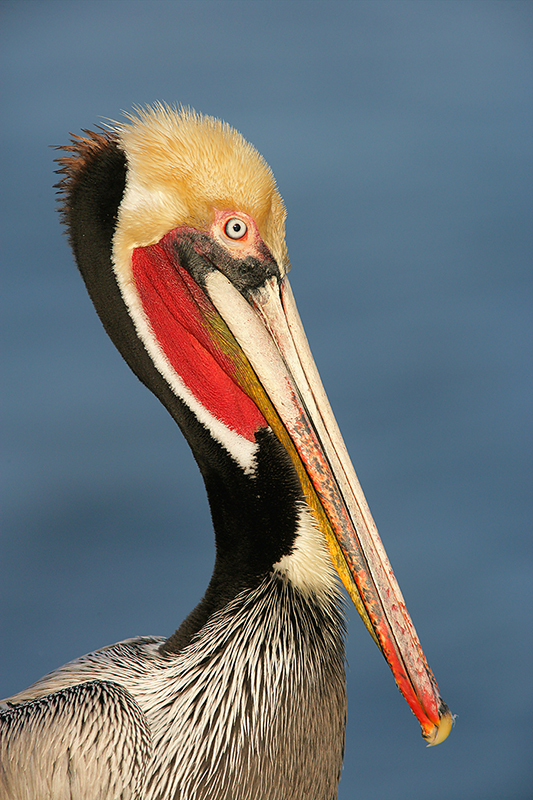
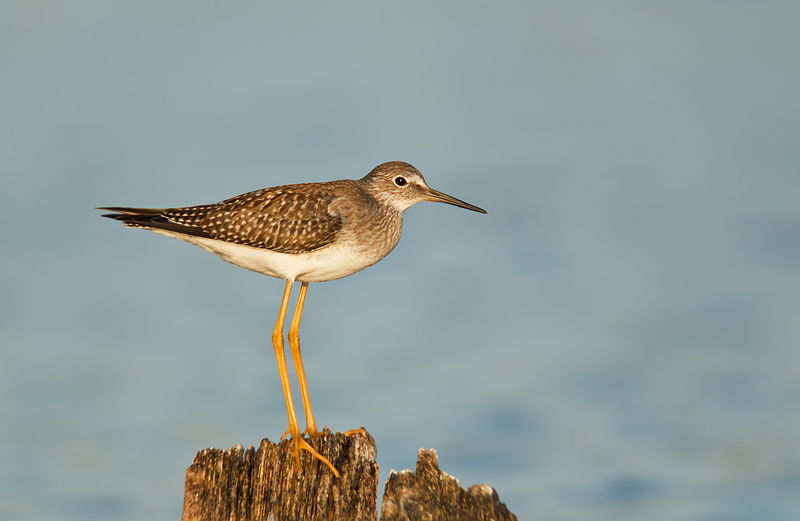
(Note: the image below is one of the many images with educational captions that are being added to the update of the 7D UG.)
no images were found
Here, working in vertical format, I manually selected the top center AF point to ensure both sharp focus on the eyes and a pleasing composition. The 7D guide also explains the benefits of setting up your camera to recognize both vertically and horizontally oriented images so that you can choose a different active AF sensor for each.
New folks can purchase the 7D Users Guide here. They will receive the update as above.
CANON EOS-1D MARK IV USERS GUIDE FREE EXCERPT
C.Fn III Set (Autofocus/Drive): each item in this set is left at the default except for the following:
C. Fn-III-2 (AI Servo tracking sensitivity) is set to Slow. This increases the chance that the AF system will stay on the subject (rather than attempt to search for the background) should the sensor momentarily fall off the subject. It also helps to prevent the system from tracking another subject that has entered the frame. Some folks swear by setting this one to between Slow and 0.
C. Fn-III-3: (AI Servo 1st/2nd image priority): I leave this at the default: AF priority/Tracking priority. Doing so tells the camera to take an extra millisecond or two to ensure that the first image (in a series) is sharply focused and to do the same with subsequent images as the system tracks the moving subject (that is of course being tracked by AI Servo AF).
C. Fn III-4 (AI Servo AF tracking method): I set this to “1: Continuous AF track priority” so that the AF system will stay focused on the bird that I have chosen to focus on. I do not want the system to quickly switch to a closer subject be it a telephone pole or another bird.
C.Fn III-5 (Lens drive when AF impossible): Important note: With a single exception (see below), setting C.Fn III/5 to “1: Focus search off” should be done only when you are photographing flying or running subjects that are at a relatively consistent distance from your position. Doing so will prevent the AF system from searching when AF is lost. (To quote the camera manual, It prevents the camera from becoming grossly out of focus as it attempts to focus again. Especially convenient with super-telephoto lenses that can become extremely out-of-focus.) Note: When doing flight photography make sure that the Limit Range switch on your lens is set to Far Distance range (rather than to Full). If you lose sharp focus momentarily on a flying bird, simply release the shutter button and press it half-way again to re-acquire focus; in most cases AF re-acquisition will be almost instantaneous. My experience shows that if the birds are flying at a relatively consistent distance, a higher percentage of images will be in perfect focus when C. Fn-III-5/1 is set than when C. Fn-III-5/0 is set.
When Focus search is off and you try to focus on a subject much closer or more distant than the previous subject, it is absolutely imperative that you pre-focus manually or the AF system may not see the subject at all and will not even attempt to focus. The longer the focal lengths of the lens the more likely it is that the system will not see the subject. I have even had folks on a BIRDS AS ART Instructional Photo-Tour (IPT) come to me complaining that their lens or camera was broken and would not focus; they had simply forgotten that they had set “focus search off.”
Here is the lone exception: when you are using long lenses with teleconverters you may–depending on the lens, the camera, and the teleconverter, be limited to using only the central AF sensor. If for example, you are trying to create a vertical head and neck portrait of a long-necked bird like a cormorant with the 800 f/5.6L IS lens and the 1.4X II TC, having only the central sensor available can be a problem. The bird is moving its head and neck continuously. If you try to use One Shot AF, it is likely that the images will not be accurately focused; by the time that you lock focus and recompose, the bird will have shifted its position. If you use AI Servo AF and keep the central sensor on the bird’s neck it is likely that the bill will be either out of the frame or touching the frame edge. The trick here is to work in AI Servo AF, go to C. Fn-III-5, and turn focus search off! Now focus on the bird’s neck; if the bird moves and the sensor falls off of the bird and onto the background the system will not search for the background! AF will remain locked on the bird and follow its movement. You can frame the head and neck as you wish without worrying about keeping the sensor on the birds neck. (Note: this works best with distant, detail-less backgrounds.) When you move on to something else, be sure to turn focus search back on.
When working with a BLUBB or another beanbag you must set C. Fn-III-5: 0 (Focus search on) because it is impossible to focus manually when using a big lens on a beanbag. To learn about the BLUBB, click here.
C. Fn III-6 (Lens AF stop button function): When using my 400 DO I often hit one of the AF Stop buttons accidentally. They are located on the lens barrel at the end of the lens near the lens hood. This can be quite annoying when you are doing flight or action photography…. To stop this from happening, I simply set “1: AF start.” As I use the shutter button for AF start this essentially does nothing but prevent me from stopping focus when I do not want to.
Thanks to old friend and client John Bryant of South Africa for the following two suggestions:
C. Fn III-6: 4. Some folks may wish to be able to switch from One Shot AF to AI Servo AF (or vice versa) by pressing and holding one of the AF Stop buttons. If you are in One-Shot AF mode the camera will switch to AI Servo AF mode only while you hold down the button. And in the AI Servo AF mode, the camera will switch to One-Shot AF mode only while you hold down the button. This may be convenient when you need to keep switching between One-Shot AF and AI Servo AF for a subject that keeps moving and stopping. (Note: I find it very hard to reach the AF Stop buttons on all of the big super-telephoto lenses that I have used; on the 800, it is impossible for me to do so.)
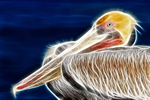
(Note: the image below is one of the many images with educational captions that were added to the update of the Mark IV UG.)
 |
| Brown Pelican, LaJolla, CA Image copyright 2009: Arthur Morris/BIRDS AS ART |
| Heres one made with the 800 and the 1.4X II TC (remember: central sensor only with that combo) where I wanted to stay in AI Servo in case the bird took flight but at the same time, wanted to put the bird back in the frame. The solution was to set C.Fn. III-5 to 1: Focus search off so. Once I did that I would focus on the bird and then point the lens to the right to get the composition that I wanted. Even though the central sensor was no longer on the bird the system did not search for the (soft and distant) background. |
New folks can purchase the Mark IV Users Guide here. They will or course received the updated version.